Generic Action Form
When defining an integration, we need to create different elements in Cenit: flows, transformations, events, data types, etc. Those objects usually contain other objects, for example, a parser translator contains a target data type, a converter translator contains a source data type and a target data type, an import flow contains a parser translator, and so on. Cenit facilitates that association between two objects, so when you are creating an object A that contains an object B, you can select B from a list of objects created in advance or you can create the object B directly in the same window you're creating the object A. Thus, no matter the menu you're working with, you might find similar input components , which allow to select an existing object or create a new one. Let's see some examples.
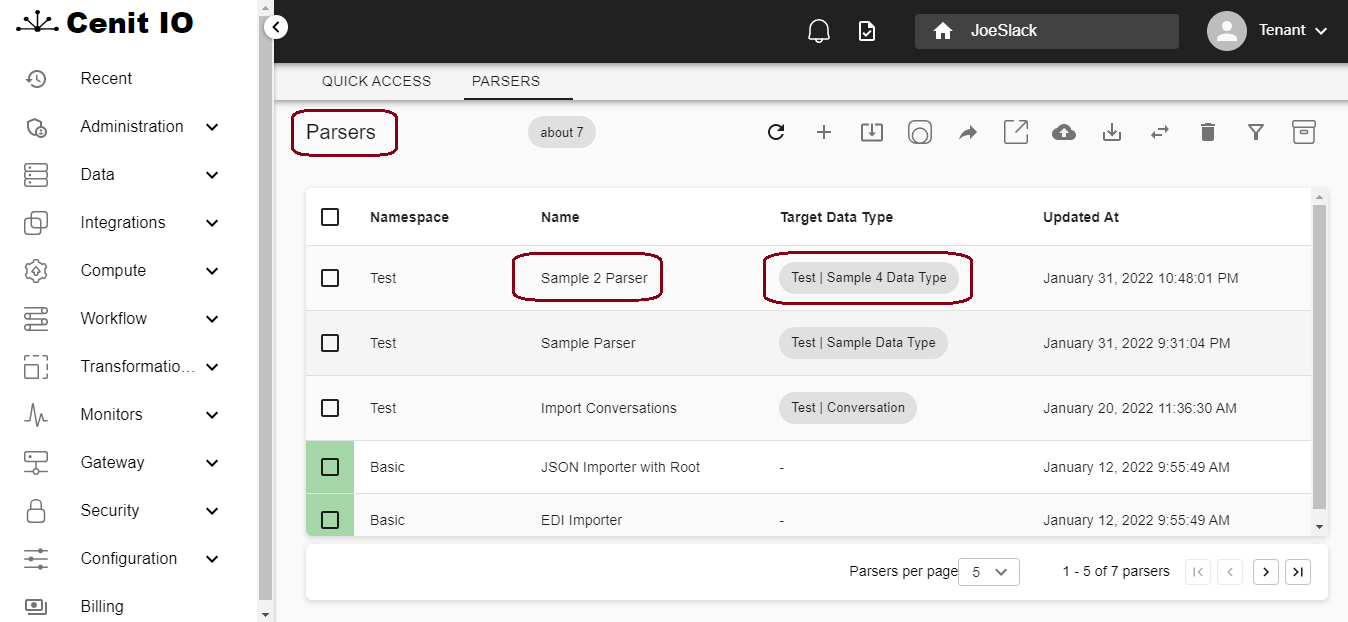
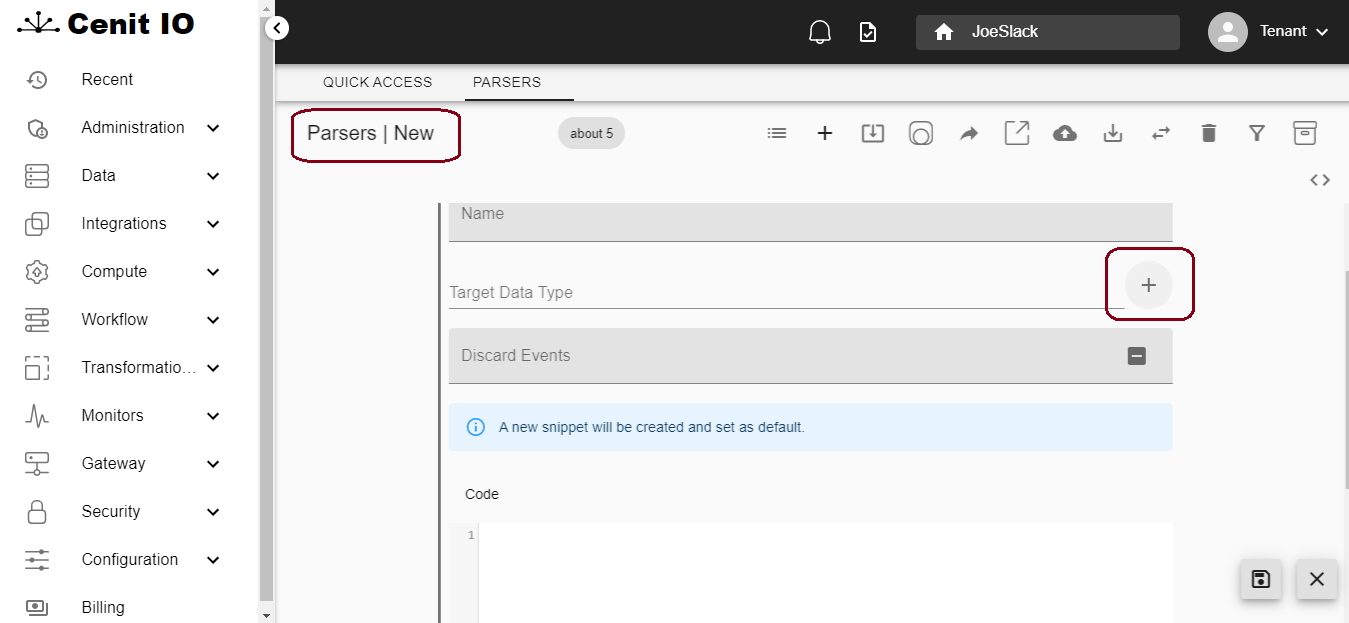
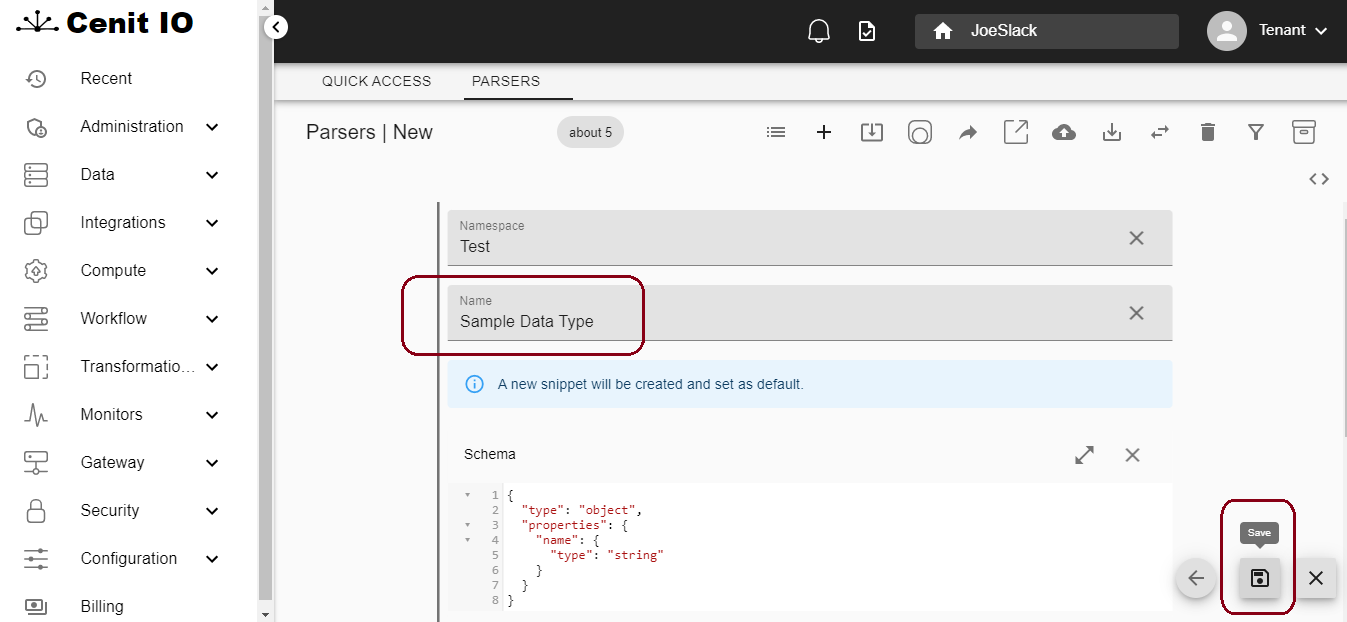
When creating a parser translator, you can select the target data type from a list of data types previously created, as shown below:

or you can create a new data type directly by pressing the buton +, as shown below:
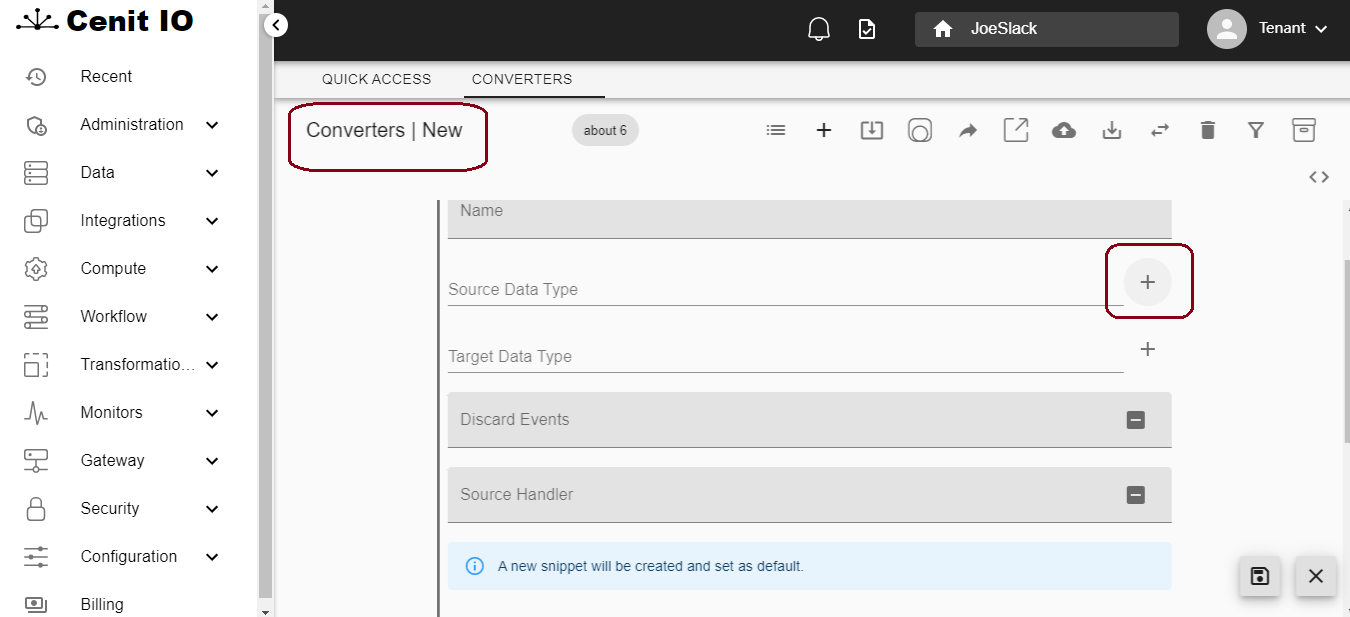
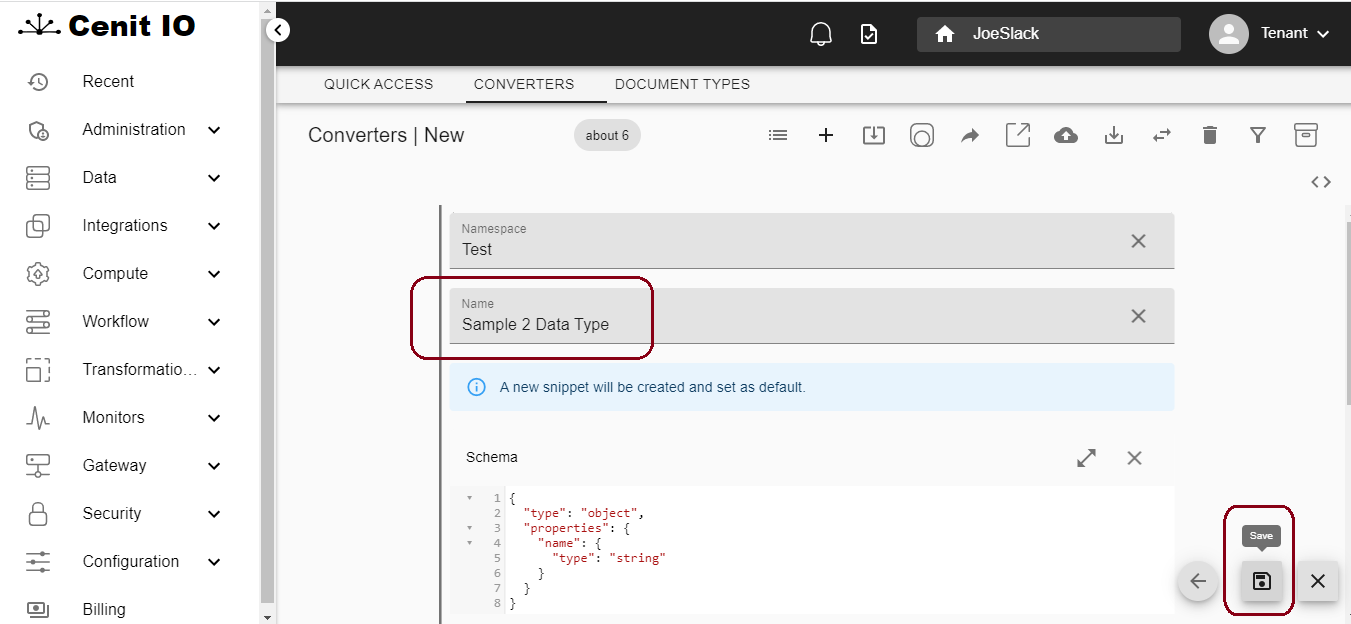
When creating a converter translator, you can select the source data type from a list of data types previously created, as shown below:

or you can create a new data type directly by pressing the buton +, as shown below:
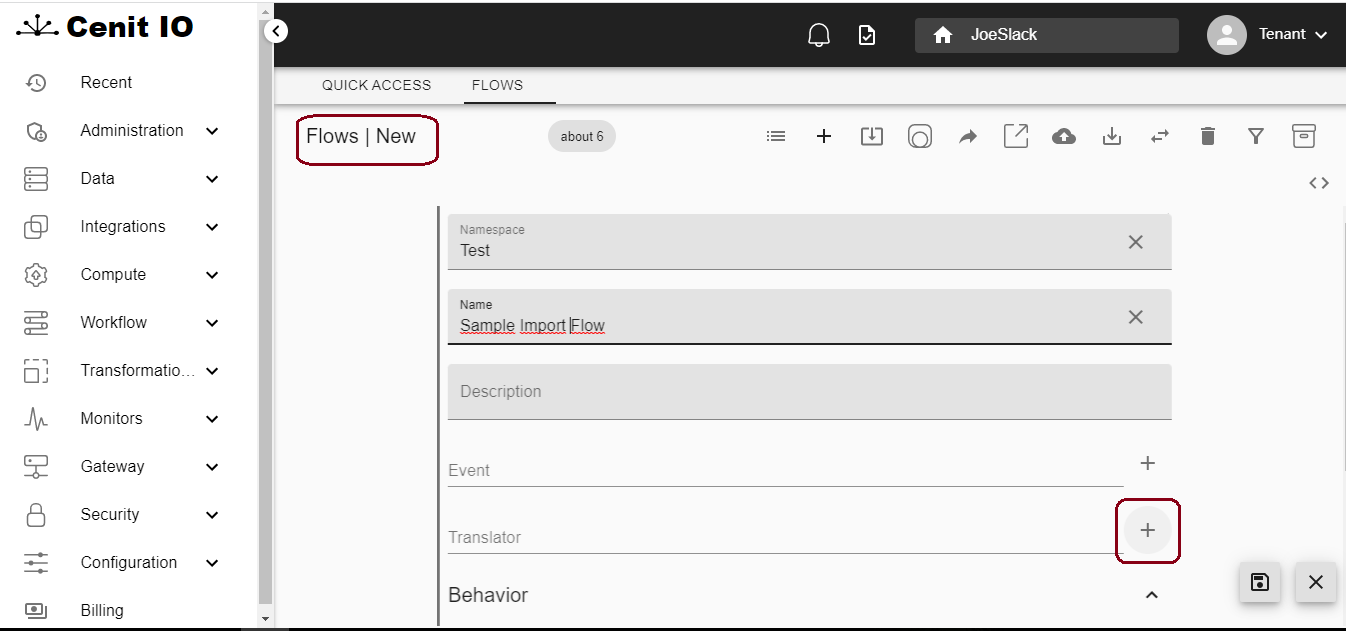
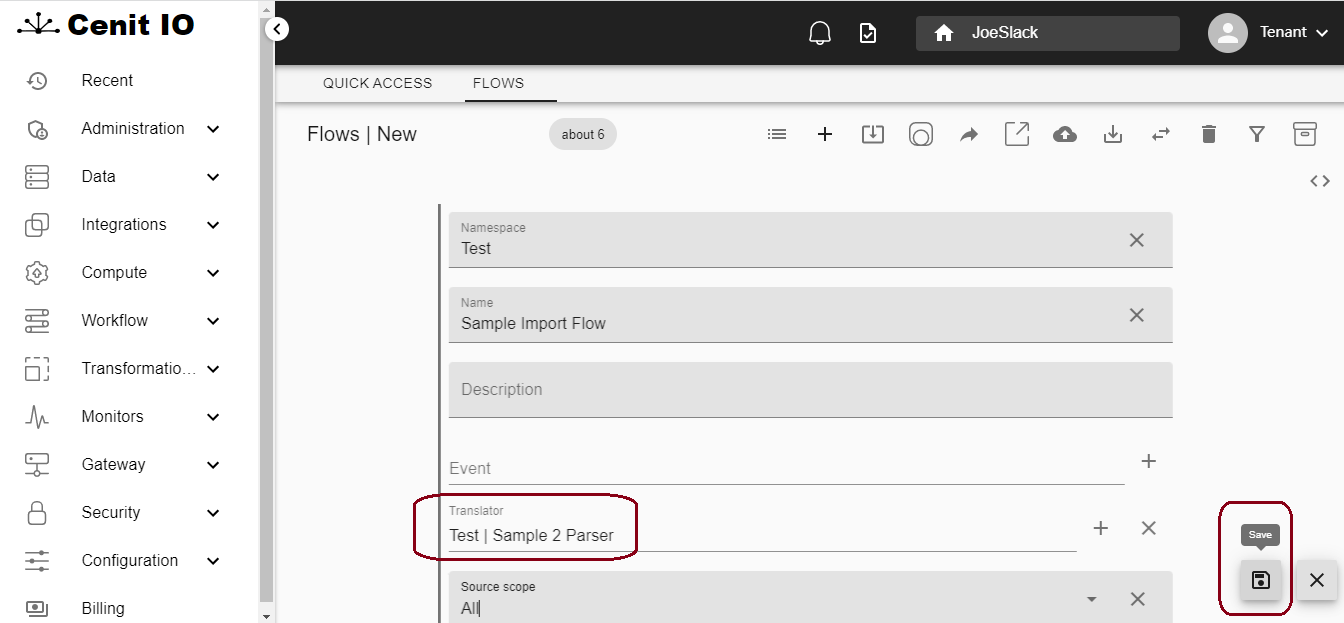
When creating a flow, you can select the translator from a list of translators previously created, as shown below:

or you can create a new translator directly by pressing the buton +, as shown below:

While creating new elements in Cenit, you're going to find the same components time after time, regardless of the menu you are working with. Every time you need to associate one object to another, you may decide between selecting from a list or creating a new one by pressing the button +. When the button + is pressed, a new window is shown embedded in the current one and all the input fields which are necessary to create the new object will be available. You should notice every time you press a button +, a new window will be shown, but the components in the new window may vary depending on what kind of object you're going to create. Creating a new data type to be assigned as target data type in the parser creation is not the same as creating a translator to be assigned to a flow, just to give an example.
Now let's see what happened when a new object B is created from the window where we're creating an object A. As an example, we're creating a Parser Translator and we press the button + to create a new Data Type.

After pressing te button +, a new window embedded in the previous one is shown with the fields related to the Data Type Creation.
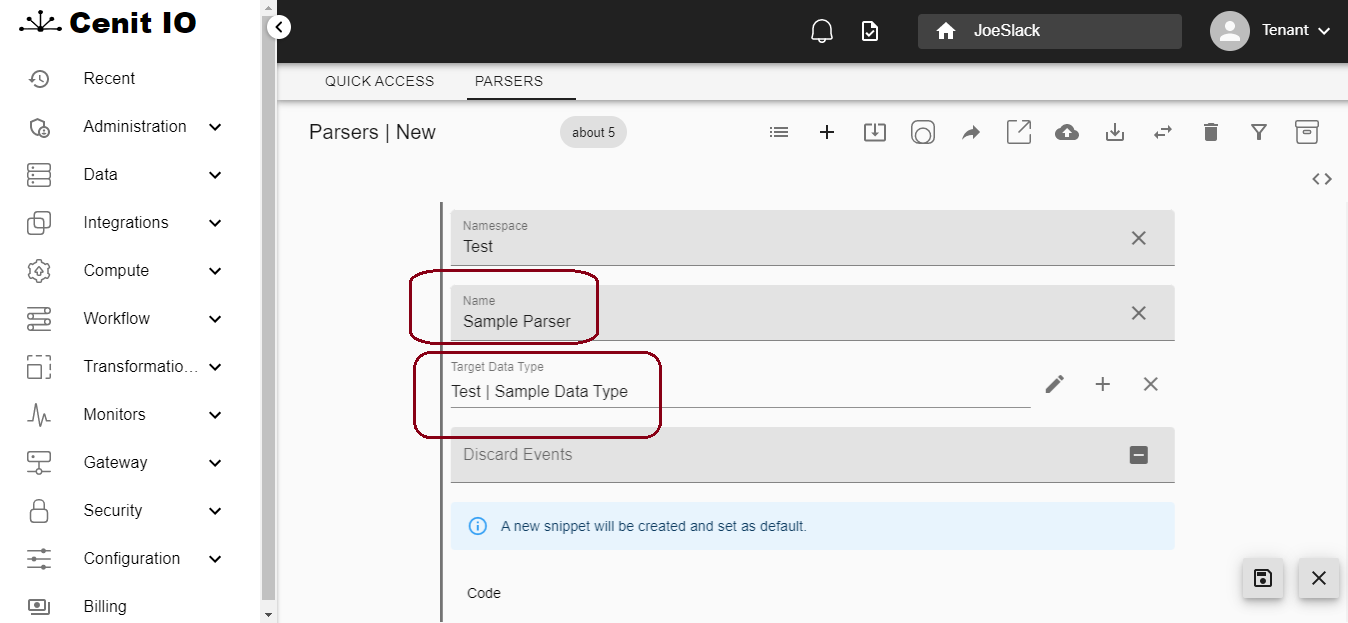
After pressing the save button a new Data Type have been successfully created and it appears as the selected target data type in the parser creation window.
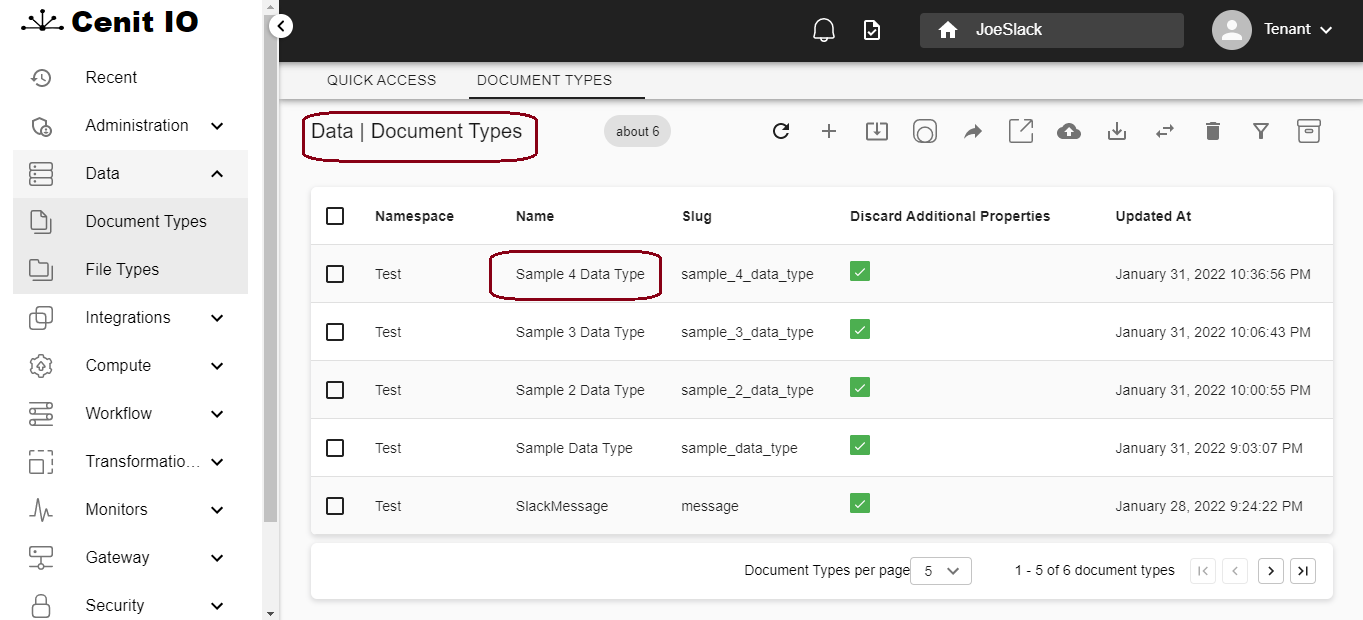
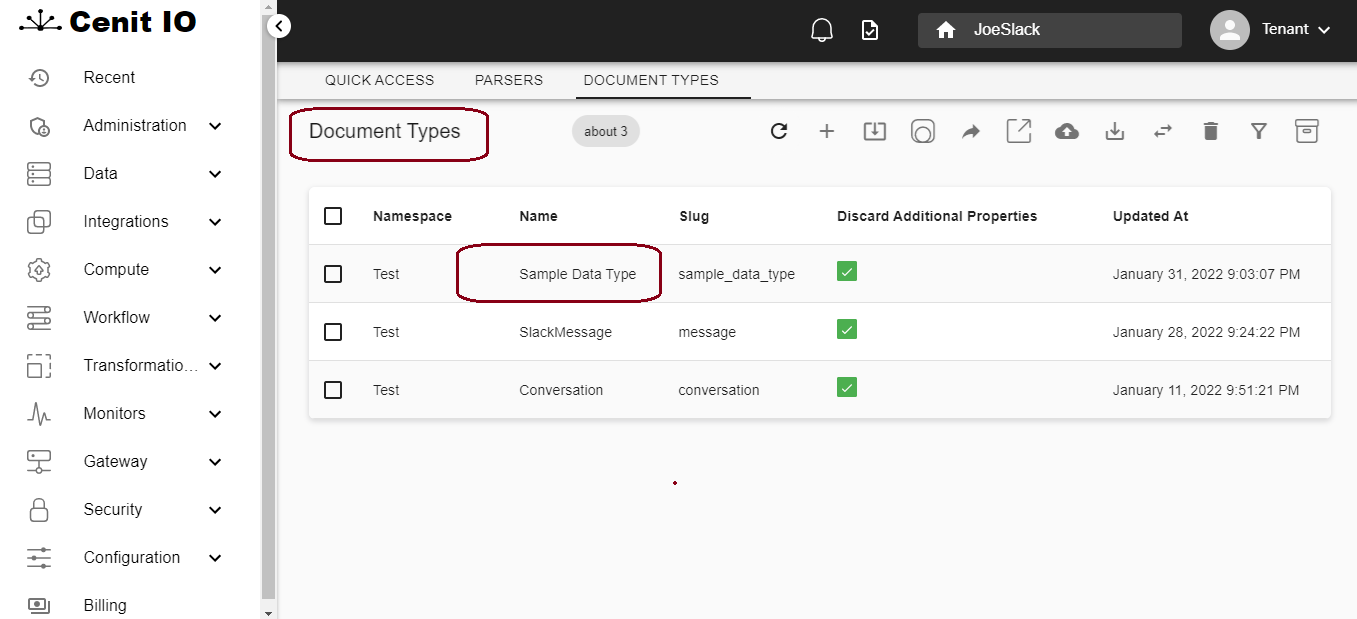
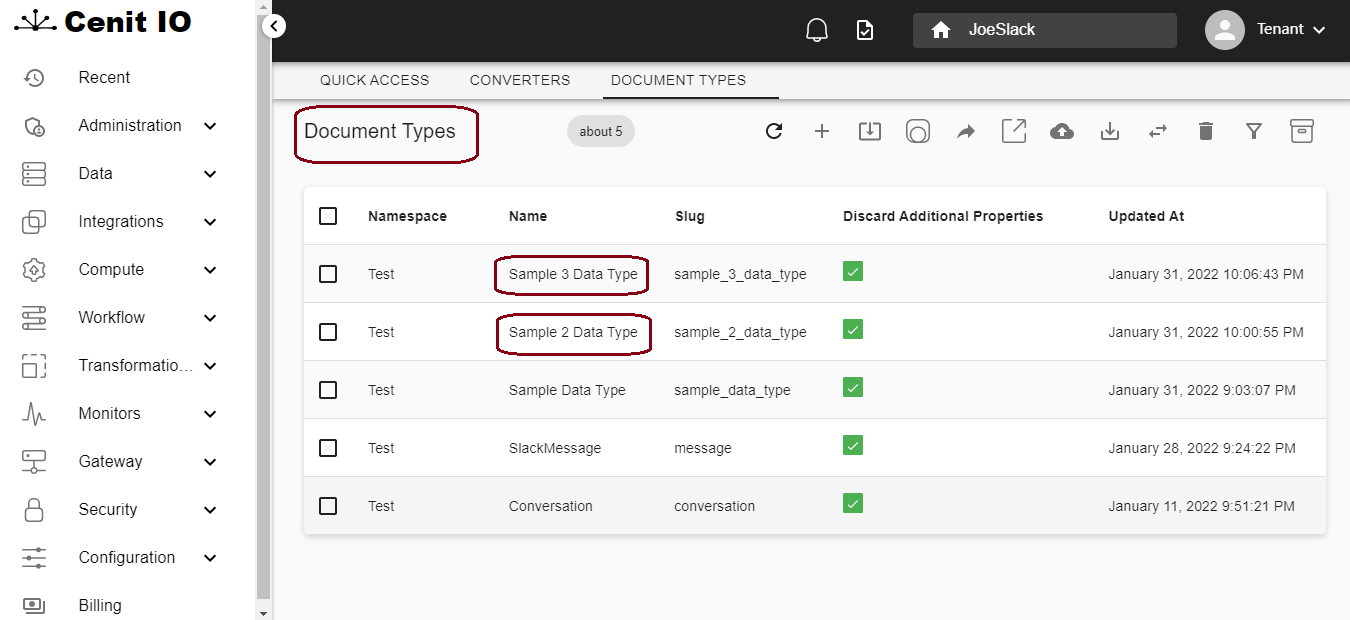
At this point, when the parser creation hasn't finished yet, if we explore the Data Types list, we can see the new data type created.
You should notice the data type created in the new action form wasn't created inside the parser. Actually, the data type was created as an independent object and it is just referenced from the parser object. As a matter of fact, after creating the data type we can cancel the parser creation and the data type will be still there in the list. After completing the creation of the parser and pressing the save button, we can see the Sample Parser in the list and we can see also the reference to the Sample Data Type created together with the parser.

Every time you decide to create a new object B to be linked to an object A, by using the new action form, the process occurs the same way; such is the case that it works even in the other two examples mentioned before despite their distinctive features. Let's go deep inside those two examples.
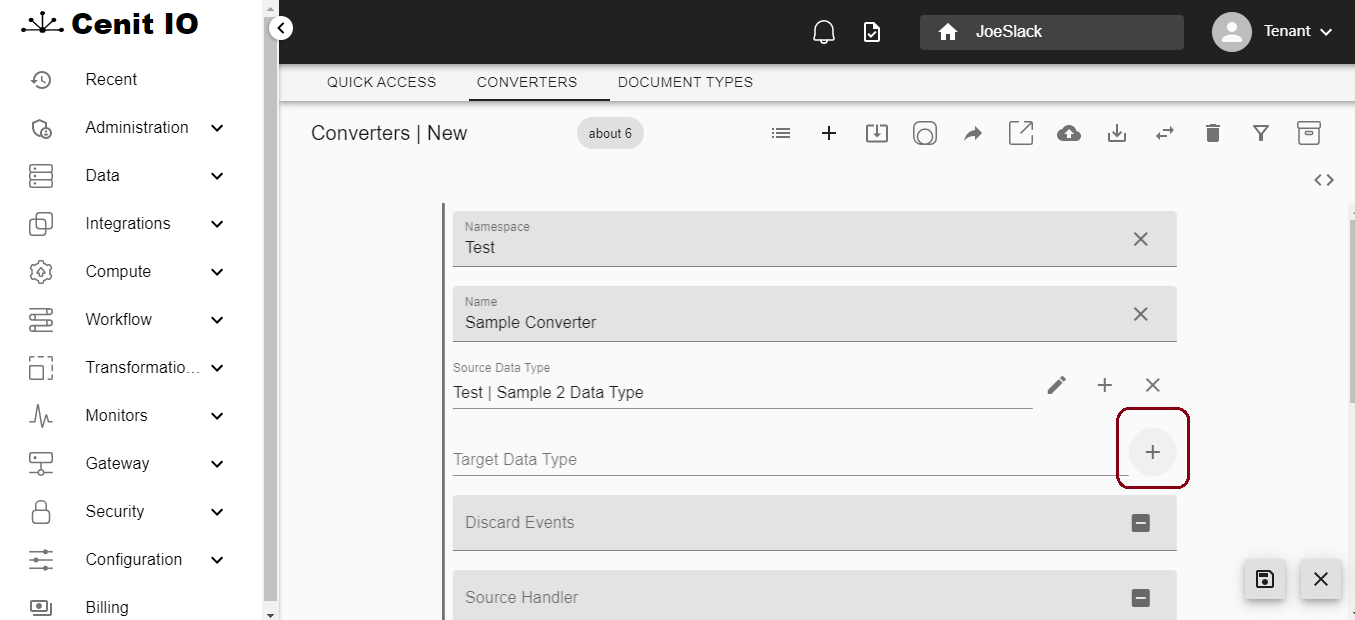
When creating a Converter Translator, for example, we can create from that window both source data type and target data type:
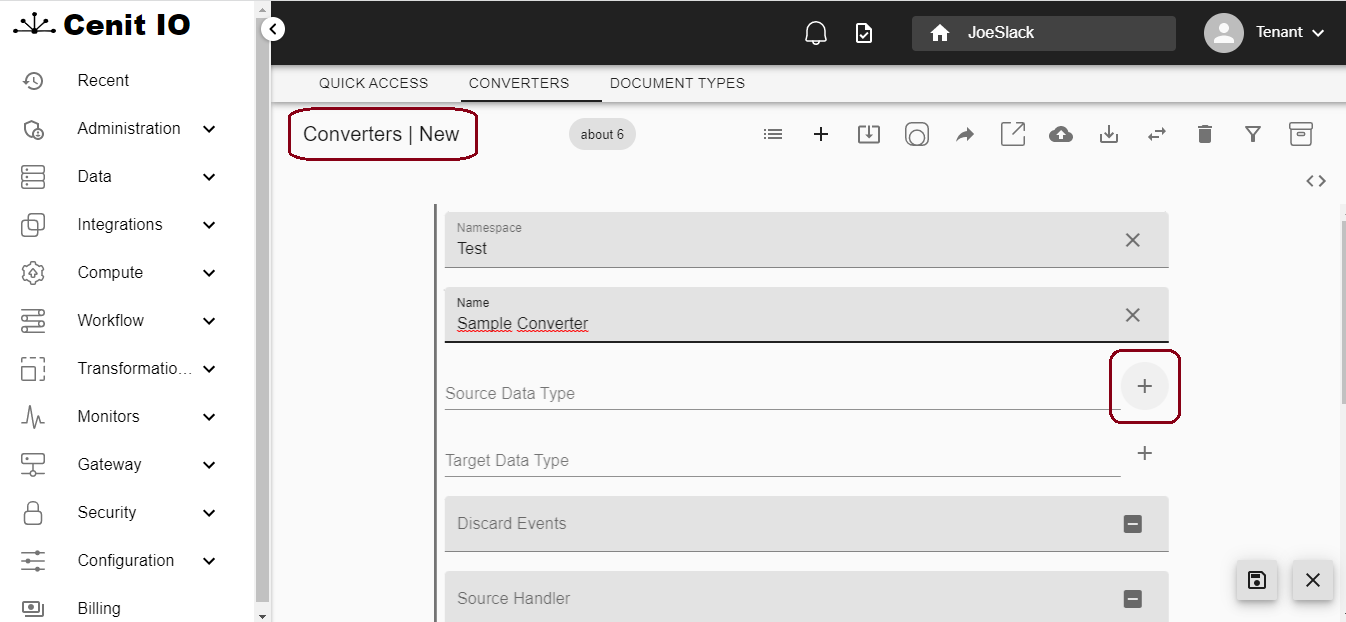
After pressing the button + we can create the source data type:
After created, the new data type appears selected as source data type:
Then we can create the target data type:

After created, the new data type appears selected as target data type:
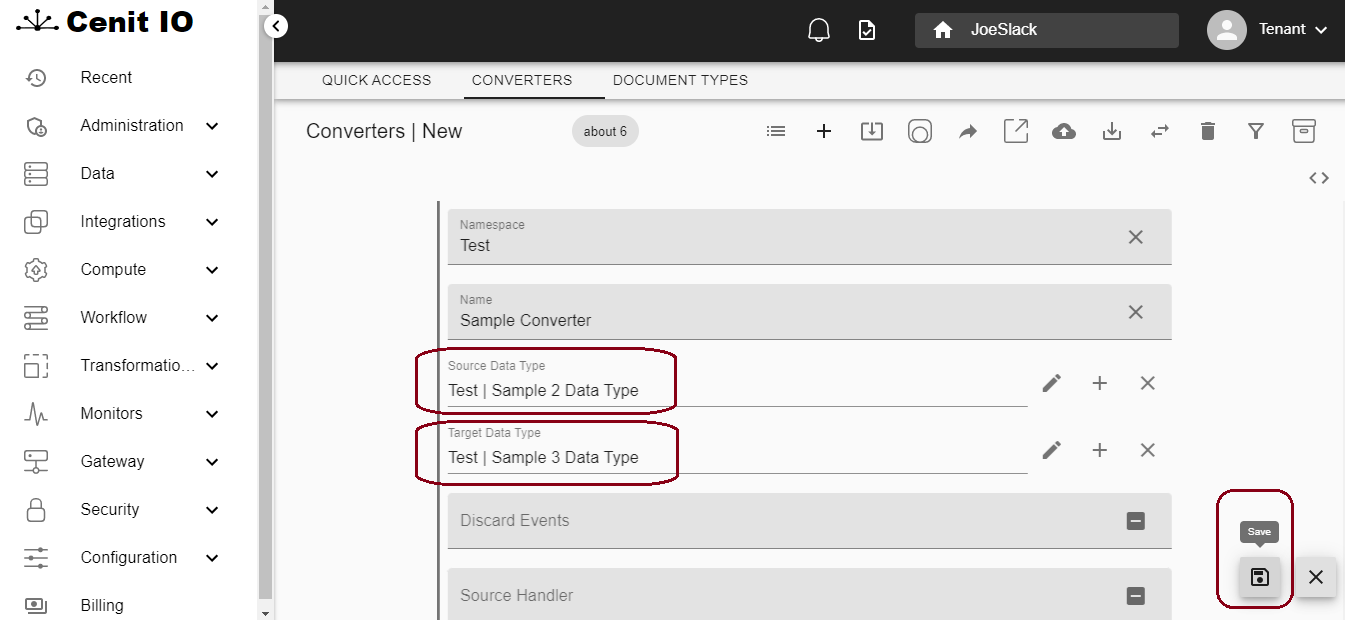
After pressing the save button, the converter appears in the list:
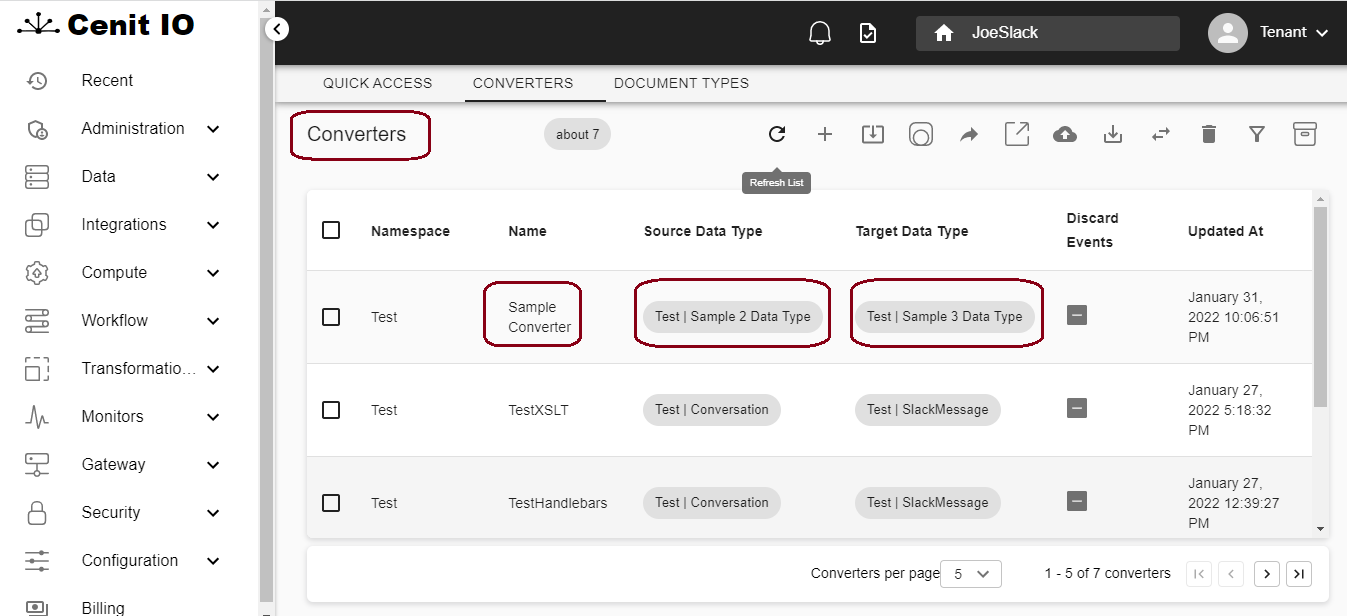
And the two data types appears in the list of data types:
The 3rd example is an interesting one: We are going to create an import flow. From the flow creation windows we're going to create a parser translator, then from the parser translator window we're going to create a data type.
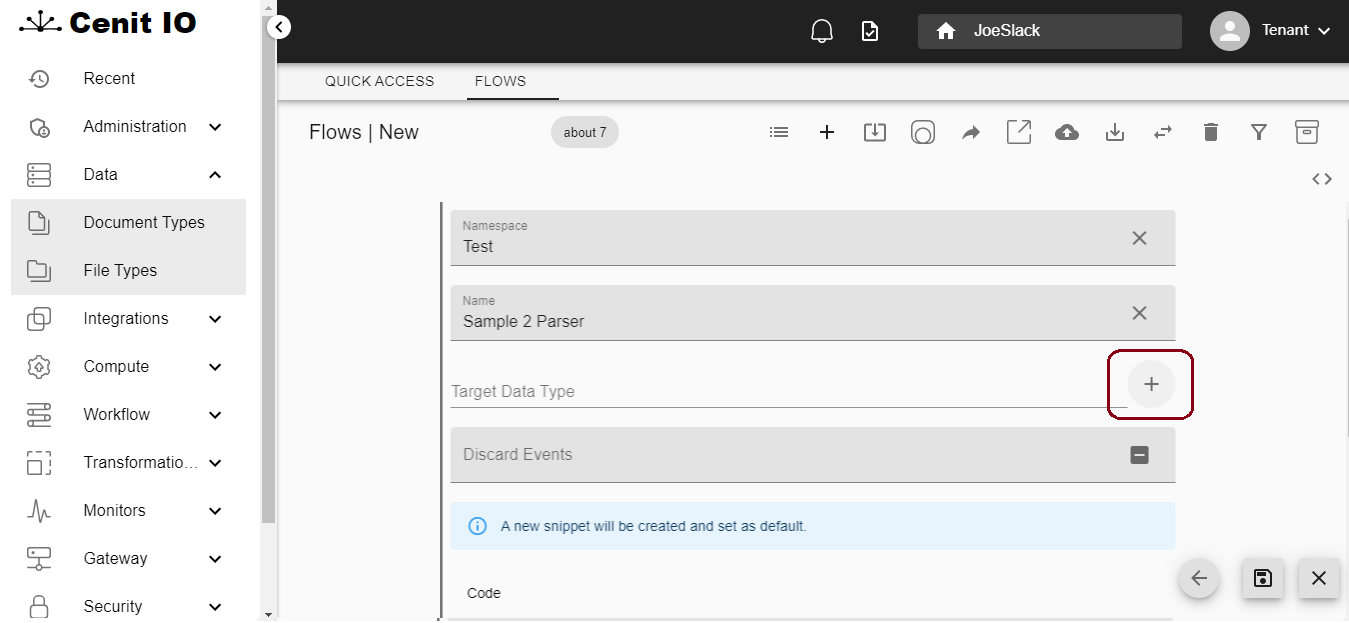
In this example, we want to create an import flow. Then we press the button + to create the parser translator:
In the window to create the parser translator, we press the button + to create the target data type:
We create the data type and press save:

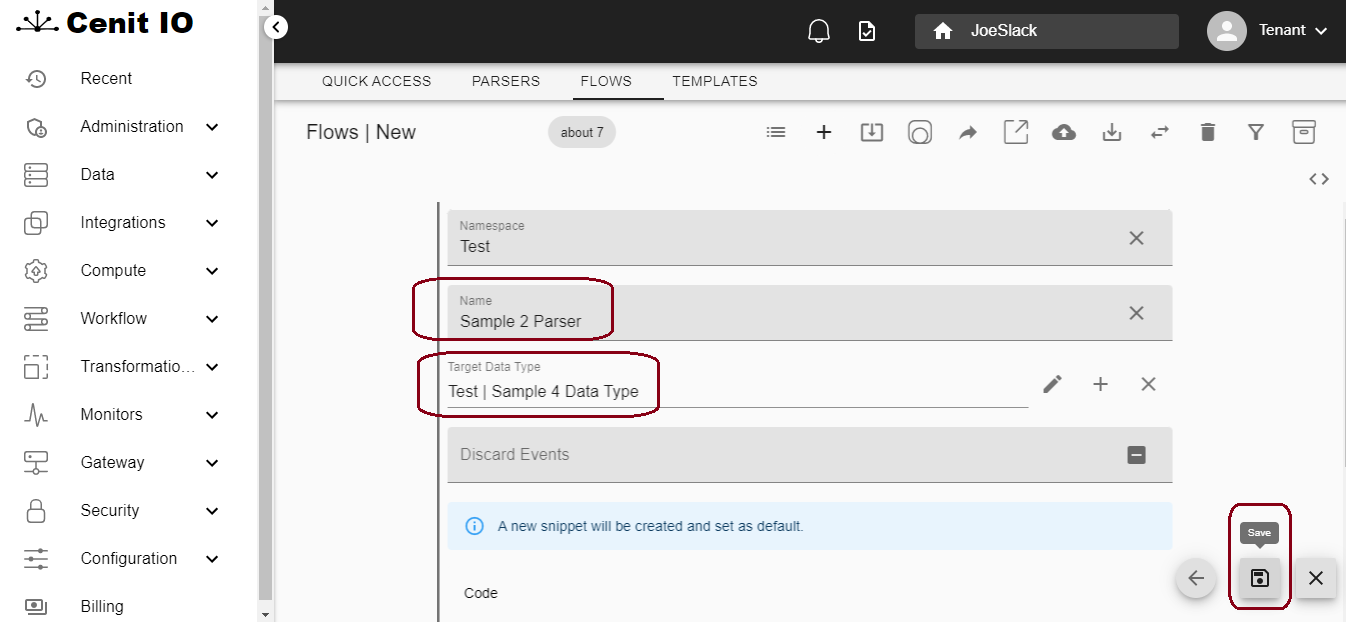
Then we go back to the window to create the parser translator and the created data type is selected as target data type. We complete creating the parser translator and press save:
After creating the parser we go back to the window to create the flow and we can see the created parser selected as translator:
After completing the creation of the flow, we press the save button and we can see the flow in the list of flows, the parser in the list of parsers and the data type in the list of data types: