Authorization Client
By defining an authorization client you can set the identifier and secret. To know the role of these elements in the authorization process, you can read the Authorization with OAuth 2.0 Section You must also select a Provider in order to set the other elements needed in the authorization process. Other optional parameters related to the token request could be set when needed.
You can perform operations on authorization clients by CENIT IO API V2 according to this API Spec in section Authorization Clients.
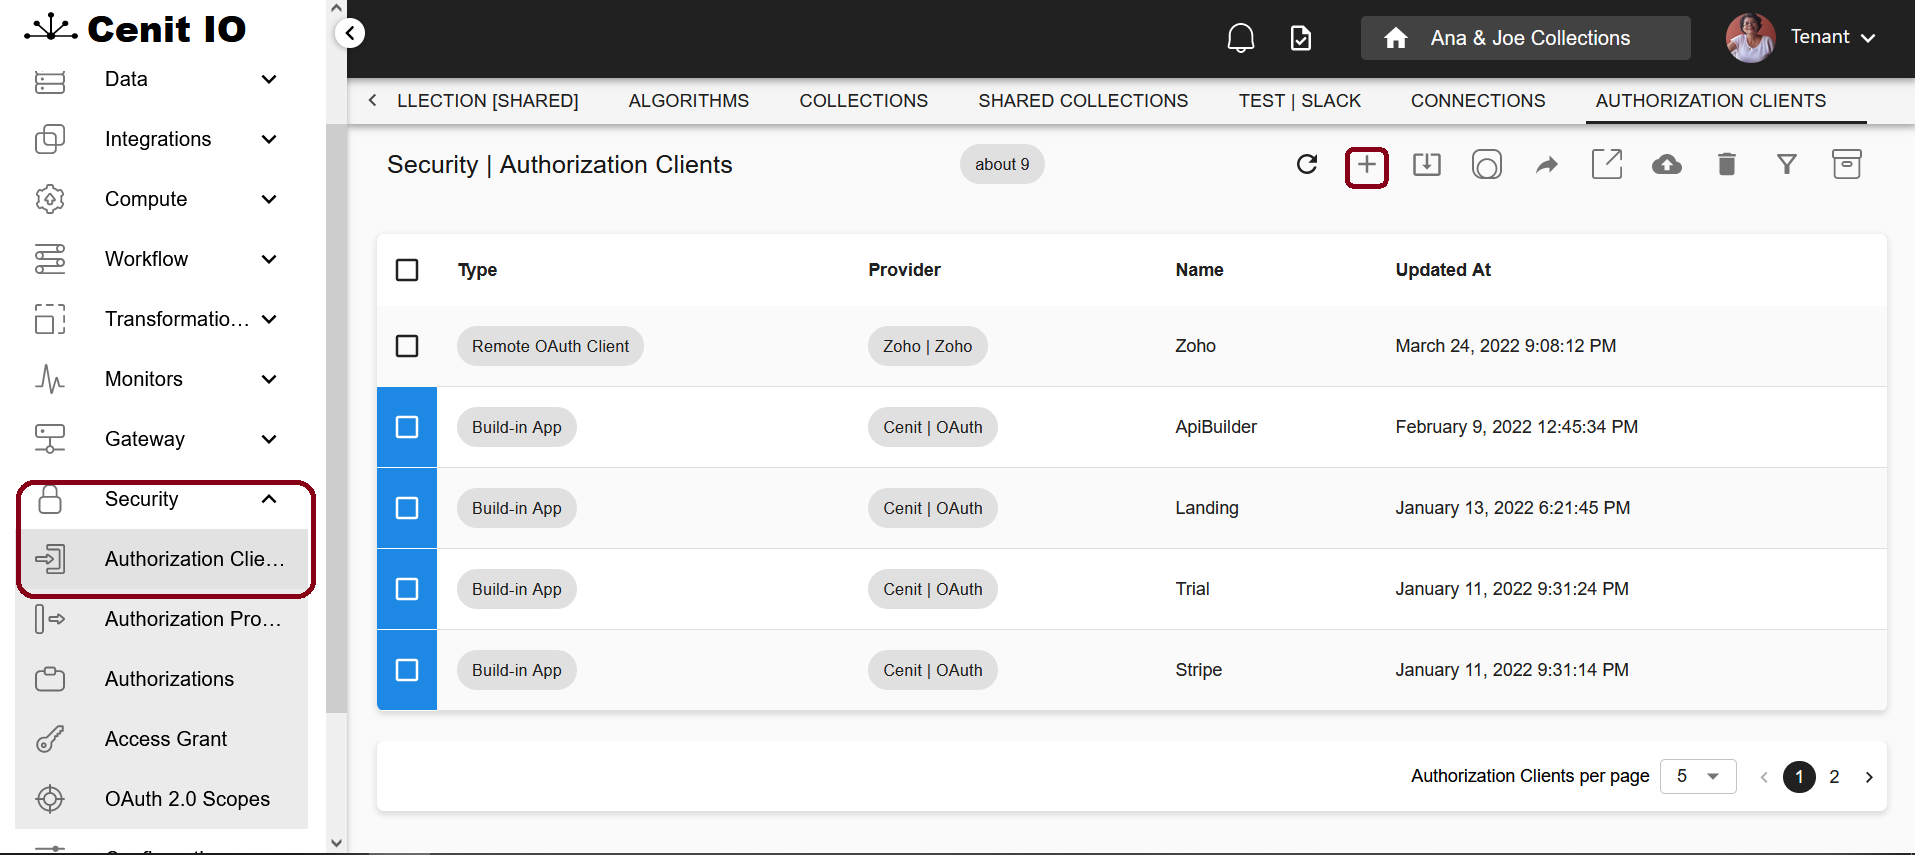
The Security/Authorization Clients submenu allows to define a new client as well as managing the previously defined ones.
Add New Authorization Client
For creating a new client, click the New button (+) in the Generic Menu:

Then, select the type of client, usually Remote OAuth Client, and fill every input field.
 When setting the provider you can select a provider previously defined.

However, you can also create the provider from the new client interface by clicking the + button in the provider field as explained in Generic Form Elements

Clicking the + button will lead you to create a provider the same way you can do it when you use the new action in the Authorization Providers submenu.
After associating a provider to the client, you must set the identifier and secret parameters. You also need to assign the client to a Namespace and enter a Name that allows to link it with an Authorization.
List of clients
After pressing the Save button, the client appears in the client list.
 Managing an authorization client
You can manage an authorization client by selecting it and pressing one of the buttons in the Generic Menu. For example, the next figure shows an authorization client to be edited:

Similarly, other operations can be performed on that authorization client.