Tenants
Cenit is a multi-tenant iPaaS designed to orchestrate data flows that may involve several data formats and communication protocols.
Multi-tenancy means that processes have their own dedicated areas, even though they are actually sharing an environment. This means the customer can separate business areas and their respective integration needs. For example, you can have a tenant for development and another tenants for test, staging and production.
Cenit allows that single users can create multiple tenants, which is very useful for developing B2B applications. When a B2B solution is made, each end customer data remains in an independent tenant, taking advantage of tenants provide logical isolation in a physically shared context.
When a user creates a tenant he/she access the tenant with role Admin. Admins can manage all the tenants owned by he/she, by accesing the submenu Tenants in Administration:

Add New Tenant.
A user can add new tenants as long as he haven't exceeded the maximum amount of tenants on his/her plan.
For creating a new tenant, press the + button in the generic menu bar.

Next, you must fill every field with the information related to the tenant and press the save button

List of tenants.
After pressing the save button you can see the new tenant on the list of tenants. You should notice the list of tenants contains only those tenants which are available to the current user.

View tenant's details.
By selecting a tenant and pressing the Show button you can see the tenant details.

The show view is shown in picture below. The tenant information includes its owner and the users with access to that tenant.

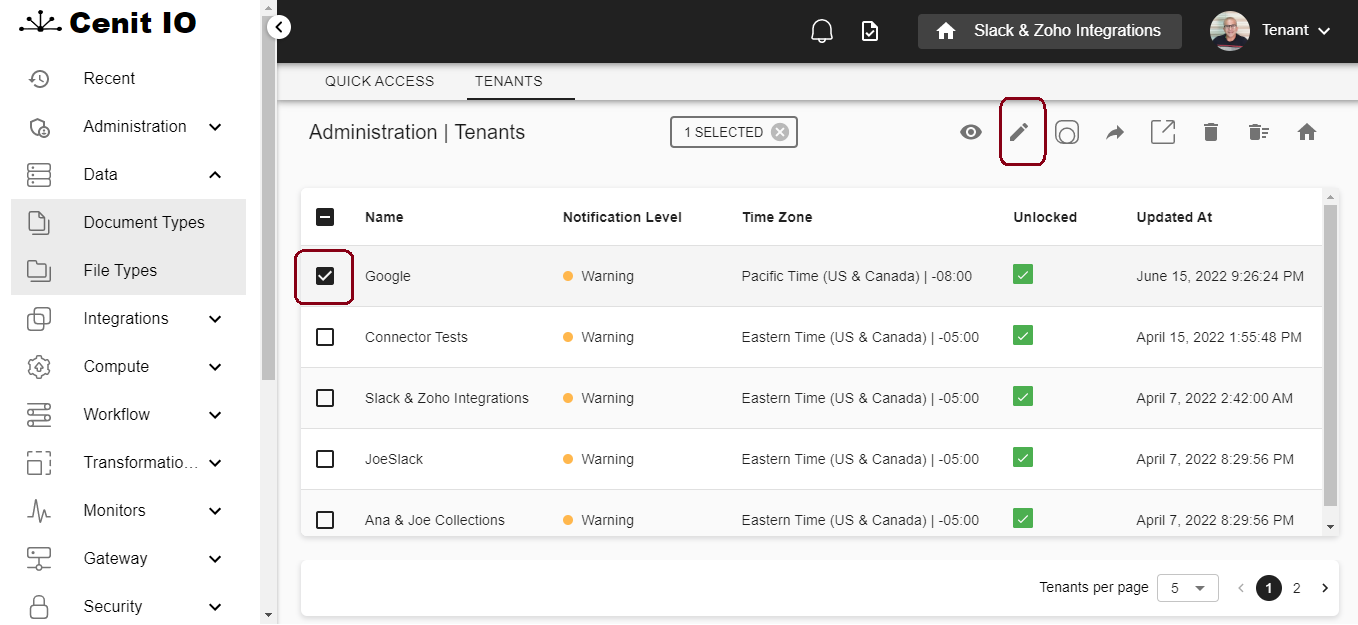
Edit the tenant.
For editing the tenant you can press the edit button in the show view or you can select the tenant in the list of tenant and press the edit button.
When you are editing the tenant there are two possible scenarios:
You are running Cenit IO on premise, so you have role of superadmin.
You are running Cenit IO in the cloud, so you have role of admin
If Cenit IO is running on premise and you have role of superadmin, all the options in the administration menu are available

Editing a tenant as a superadmin when Cenit IO is running on premise, let you add new users to your tenant by selecting the users from the list of existing users in your Cenit IO instance.

When you edit a tenant in the cloud with role admin, you are not able to add users to the tenant

In those cases you need to make a request via email to support@cenit.io providing the tenant name and the users you need to give access to your tenant. There are some pre-conditions that apply:
You must specify a tenant you're its owner.
Users should register for a Cenit account in advance.
You must provide a list of one or more users emails
Move to another tenant.
When you log in, your default tenant is shown. If you are intending to work in a different tenant, you need to move to that tenant. In the select menu at the top bar, you can choose the tenant you want to work on:

Another way of moving from one tenant to other, is selecting the tenant in the list of tenant and pressing switch as shown below.

You should pay attention to the selected tenant in the top bar, because every new element you define in Cenit belongs to that tenant.
